| Version | Author | Modification | Check |
|---|---|---|---|
| V1.0-20170217 | Reashion | Init version |
1. Support flash upgrade mode
Trough the USB line directly to the binary image file burned to the 8G EMMC
2. Tools&firmware
2.1 Linux PC
Way one: have downloaded the Cubieboard6 source code, then the FWBurningToo installation package in the source directory Path as follows:

Installation and operation FWBurningTool:
$cd owl/tools/burn_tool
$./FWBurningTool-1.1.run
Way two : After decompression, installation, such as the "Way one” , after the installation is completed, enter the Bin directory, found that the newly generated ActionsFWU.py file
Installation and operation FWBurningTool:
$ cd owl/tools/burn_tool
$ ./FWBurningTool-1.1.run
Way two: Link path: /Tools/FW Burning Tool(for Windows)_V2.01.03.tar After decompression, installation, such as the "one way" the same, after the installation is completed, enter the Bin directory, found that the newly generated ActionsFWU.py file

2.1. Windows PC
Install FWBurningTool in windows,you can download by this link:
Link path: /Tools/FW Burning Tool(for Windows)_V2.01.03.tar
2.2. firmware
Android&Linux firmware download: Link path:/image
3. Upgrade Steps
3.1. Linux
1) Enter the ADFU mode
You must enter the ADFU mode before flash the firmware,complete the following steps:
Press the ADFU button before connect the Micro USB cable,and then you can use this command to check whether the PC has been detected ADFU equipment. If the red part of the display indicates that the PC computer has correctly identified the ADFU device. The user can use the burning command to burn.
$ sudo lsusb
As shown in the following Bus 003 Device 001: ID 1d6b:0002 Linux Foundation 2.0 root hub Bus 003 Device 006: ID 10d6:10d6 Actions Semiconductor Co., Ltd Bus 004 Device 001: ID 1d6b:0003 Linux Foundation 3.0 root hub Bus 001 Device 002: ID 8087:0024 Intel Corp. Integrated Rate Matching Hub
2) Flash the image
Enter Bin directory,and then use this command to flash
$sudo python ./ActionsFWU.py --fw=/firmware path/*.fw
As shown in the following figure.

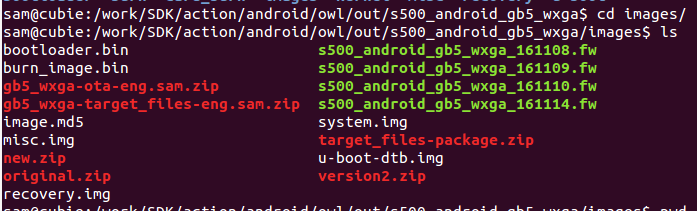
android path: /owl/out/s500_android_gb5_wxga/images
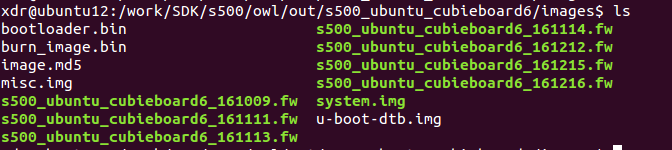
linux path: /owl/out/s500_ubuntu_cubieboard6/images
android named: s500_android_gb5_wxga_161114.fw(161114:the firmware compile time)
 linux named: s500_ubuntu_cubieboard6_161113.fw (161113:the firmware compile time)
Flash start
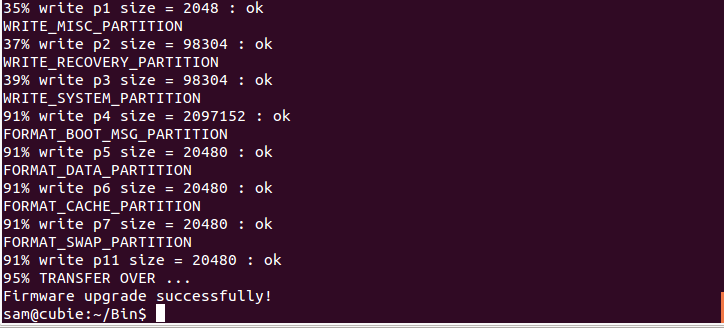
Appear “Firmware upgrade successfully!” Flash done.
3.2. Window
1) Run FWBurningTool
Open the IH firmware programming tool, connect with the development board USB line.
Remember to press the ADFU key when connecting to the USB line. After a successful connection, IH firmware tool detected 1 USB devices to be detected

2) Choose firmware
Click “选择新固件” to choose firmware and click ”替换“ to confirm.
 3) Click “下载” to flash
 Flash done when it appear “Successful”.