1. Main Interface
Cubieboard6 is the sixth generation product of Cubieboards , Cubietech Released android5.1.1 version , this document will help Cubieboard6 android users to get start quickly . The main interface as shown in the following figure.

1)Screen
There are 5 screens in main interface. As shown in the above ,user can place the widgets and applications on the Screen like “red square frame 1”,and user can click Home button in the bottom of the screen to return main screen.
2)Menu bar
As shown in the “red square frame 2”,click to  enter application interface.
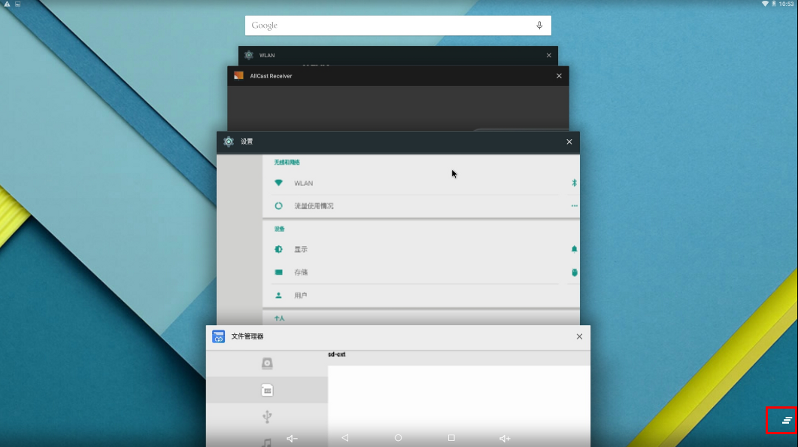
3)Virtual buttons bar As shown in the “red square frame 3”,there have virtual buttons include ''return''、''home''、''volume'' and ''multitask ''. Click ''multitask'' to enter multitask windows,user can find all running tasks in there,and click the button to clear all running tasks,as shown in the following figure.

2. Display
1)Support hdmi display , hotplug also supported. 2)The default resolution option First,CB6 android system does not support hdmi resolution switch manually. Then,hdmi display resolution according to EDID and user configuration to decide automatically.
As follow: ①When user without configuration, and hdmi can read edid,system will select the highest resolution from the edid to display. ②When user without configuration, and hdmi read edid unsuccessfully,system will select 720P 60Hz by default. ③When user configure the resolution you want, and read hdmi edid successfully , whether the resolution of the user configuration in the support of edid instruction list,if supported, it will choose user's resolution to output,if it does not support ,it will choose the highest resolution from edid to output. ④When user configure the resolution but read edid unsuccessfully,system will choose the resolution what user's configuration.
In DTS file ,the default resolution configure as follow.
hdmi:hdmi@b02c0000{ ...... default_resolution = "auto"; };
3)Cat hdmi resolution resolution support list as follow:
VID640x480P_60 = 1,
VID1280x720P_60 = 4,
VID1920x1080P_60 = 16,
VID720x576P_50 = 17,
VID1280x720P_50 = 19,
VID1920x1080P_50 = 31,
VID1280x720P_60_DVI = 126,
According to serial port or ADB to cat vid.
$cd /sys/devices/b02c0000.hdmi/
$cat vid
Eg:
 HDMI resolution is 1920x1080P_60 .
3. Network
Support wifi(2.4GHz)、Ethernet(100M)、VPN、hotspot.

There are nothing about Ethernet in setting interface,user plug ethernet cable ,if it appear ethernet icon on the top right corner,it means work well. According to use serial port or ADB to cat Ethernet information.

4. Buttons
Power Button: long press(>2s) Shutdown or reboot long press(>8s)Reboot short press Enter standby mode or wake up
Boot Button: Enter ADFU mode to flash the firmware
5. Audio Output
1)Cubieboard6 audio support earphone、miracast、hdmi audio output.
2)Audio only output from one device,when CB6 connect more than one device at the same time.
3)CB6 android system doesn't support audio output switch manually.
Audio output priority by default:
earphone>hdmi earphone>miracast
6. Data transmission
User can use USB cable to connect PC and CB6,enter USB Mass Storage.
1) use Micro USB cable to connect PC and CB6.It means connect successfully when top left corner appear usb icon.

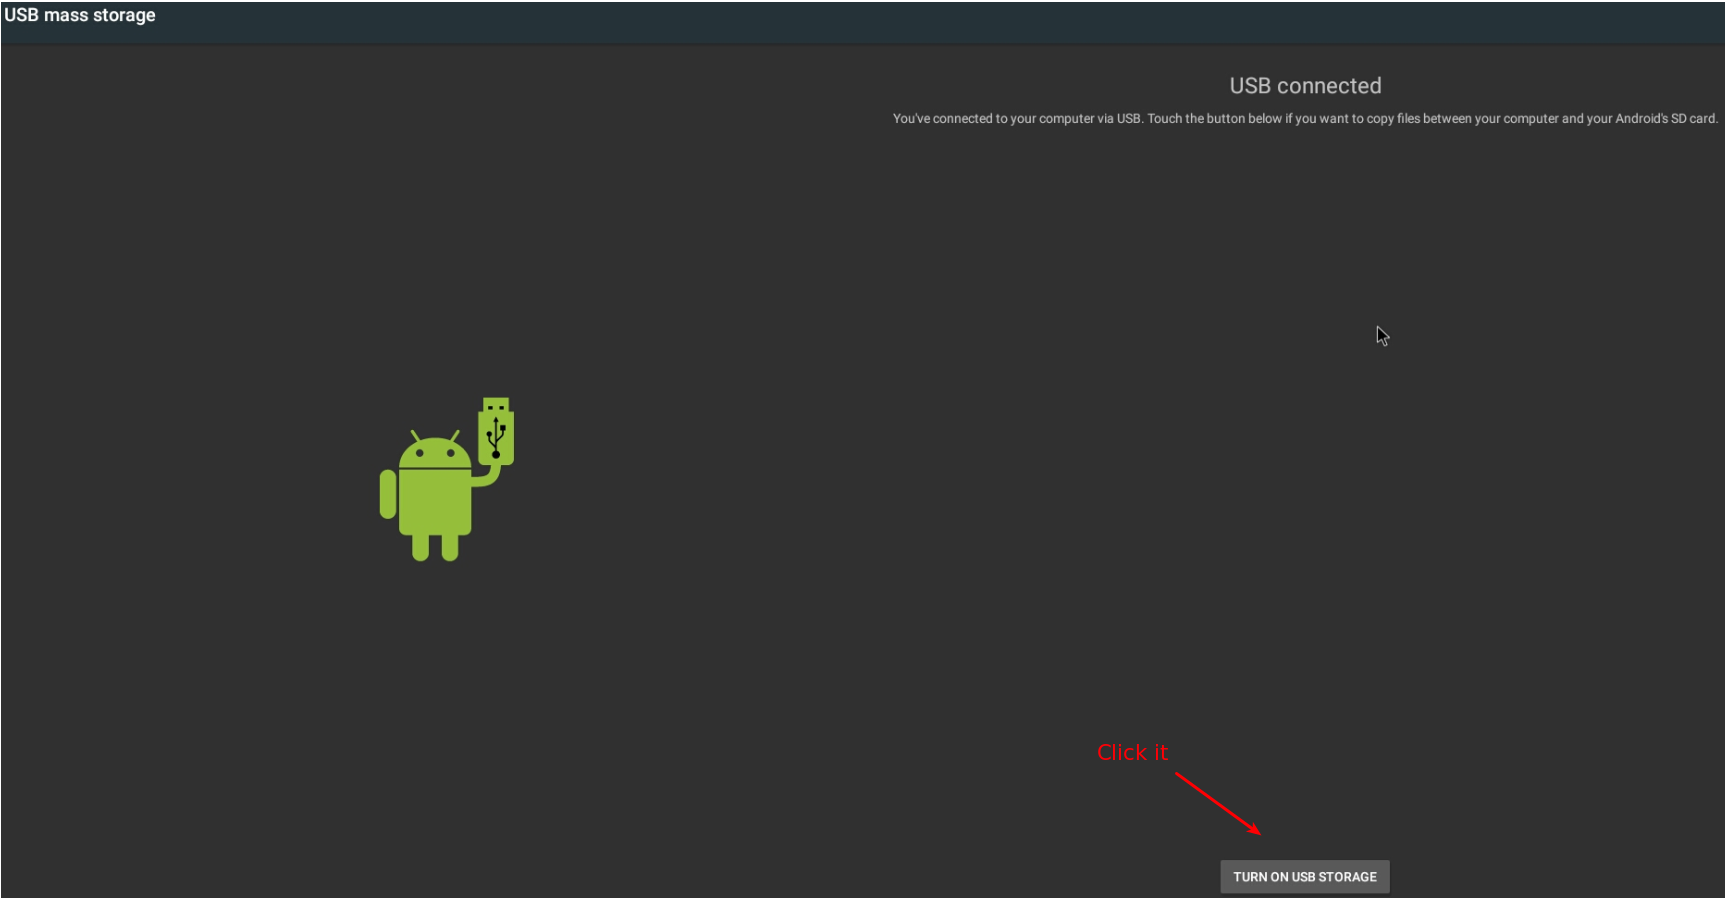
2) Execute drop-down operation on the top of the screen to displays drop-down menu.A pop-up windows appears after click ''已连接USB'' .

3) Click ''turn on usb storage'' to enter USB Mass Storage and you can copy files between PC and CB6.
7. Debug Ports
7.1. UART
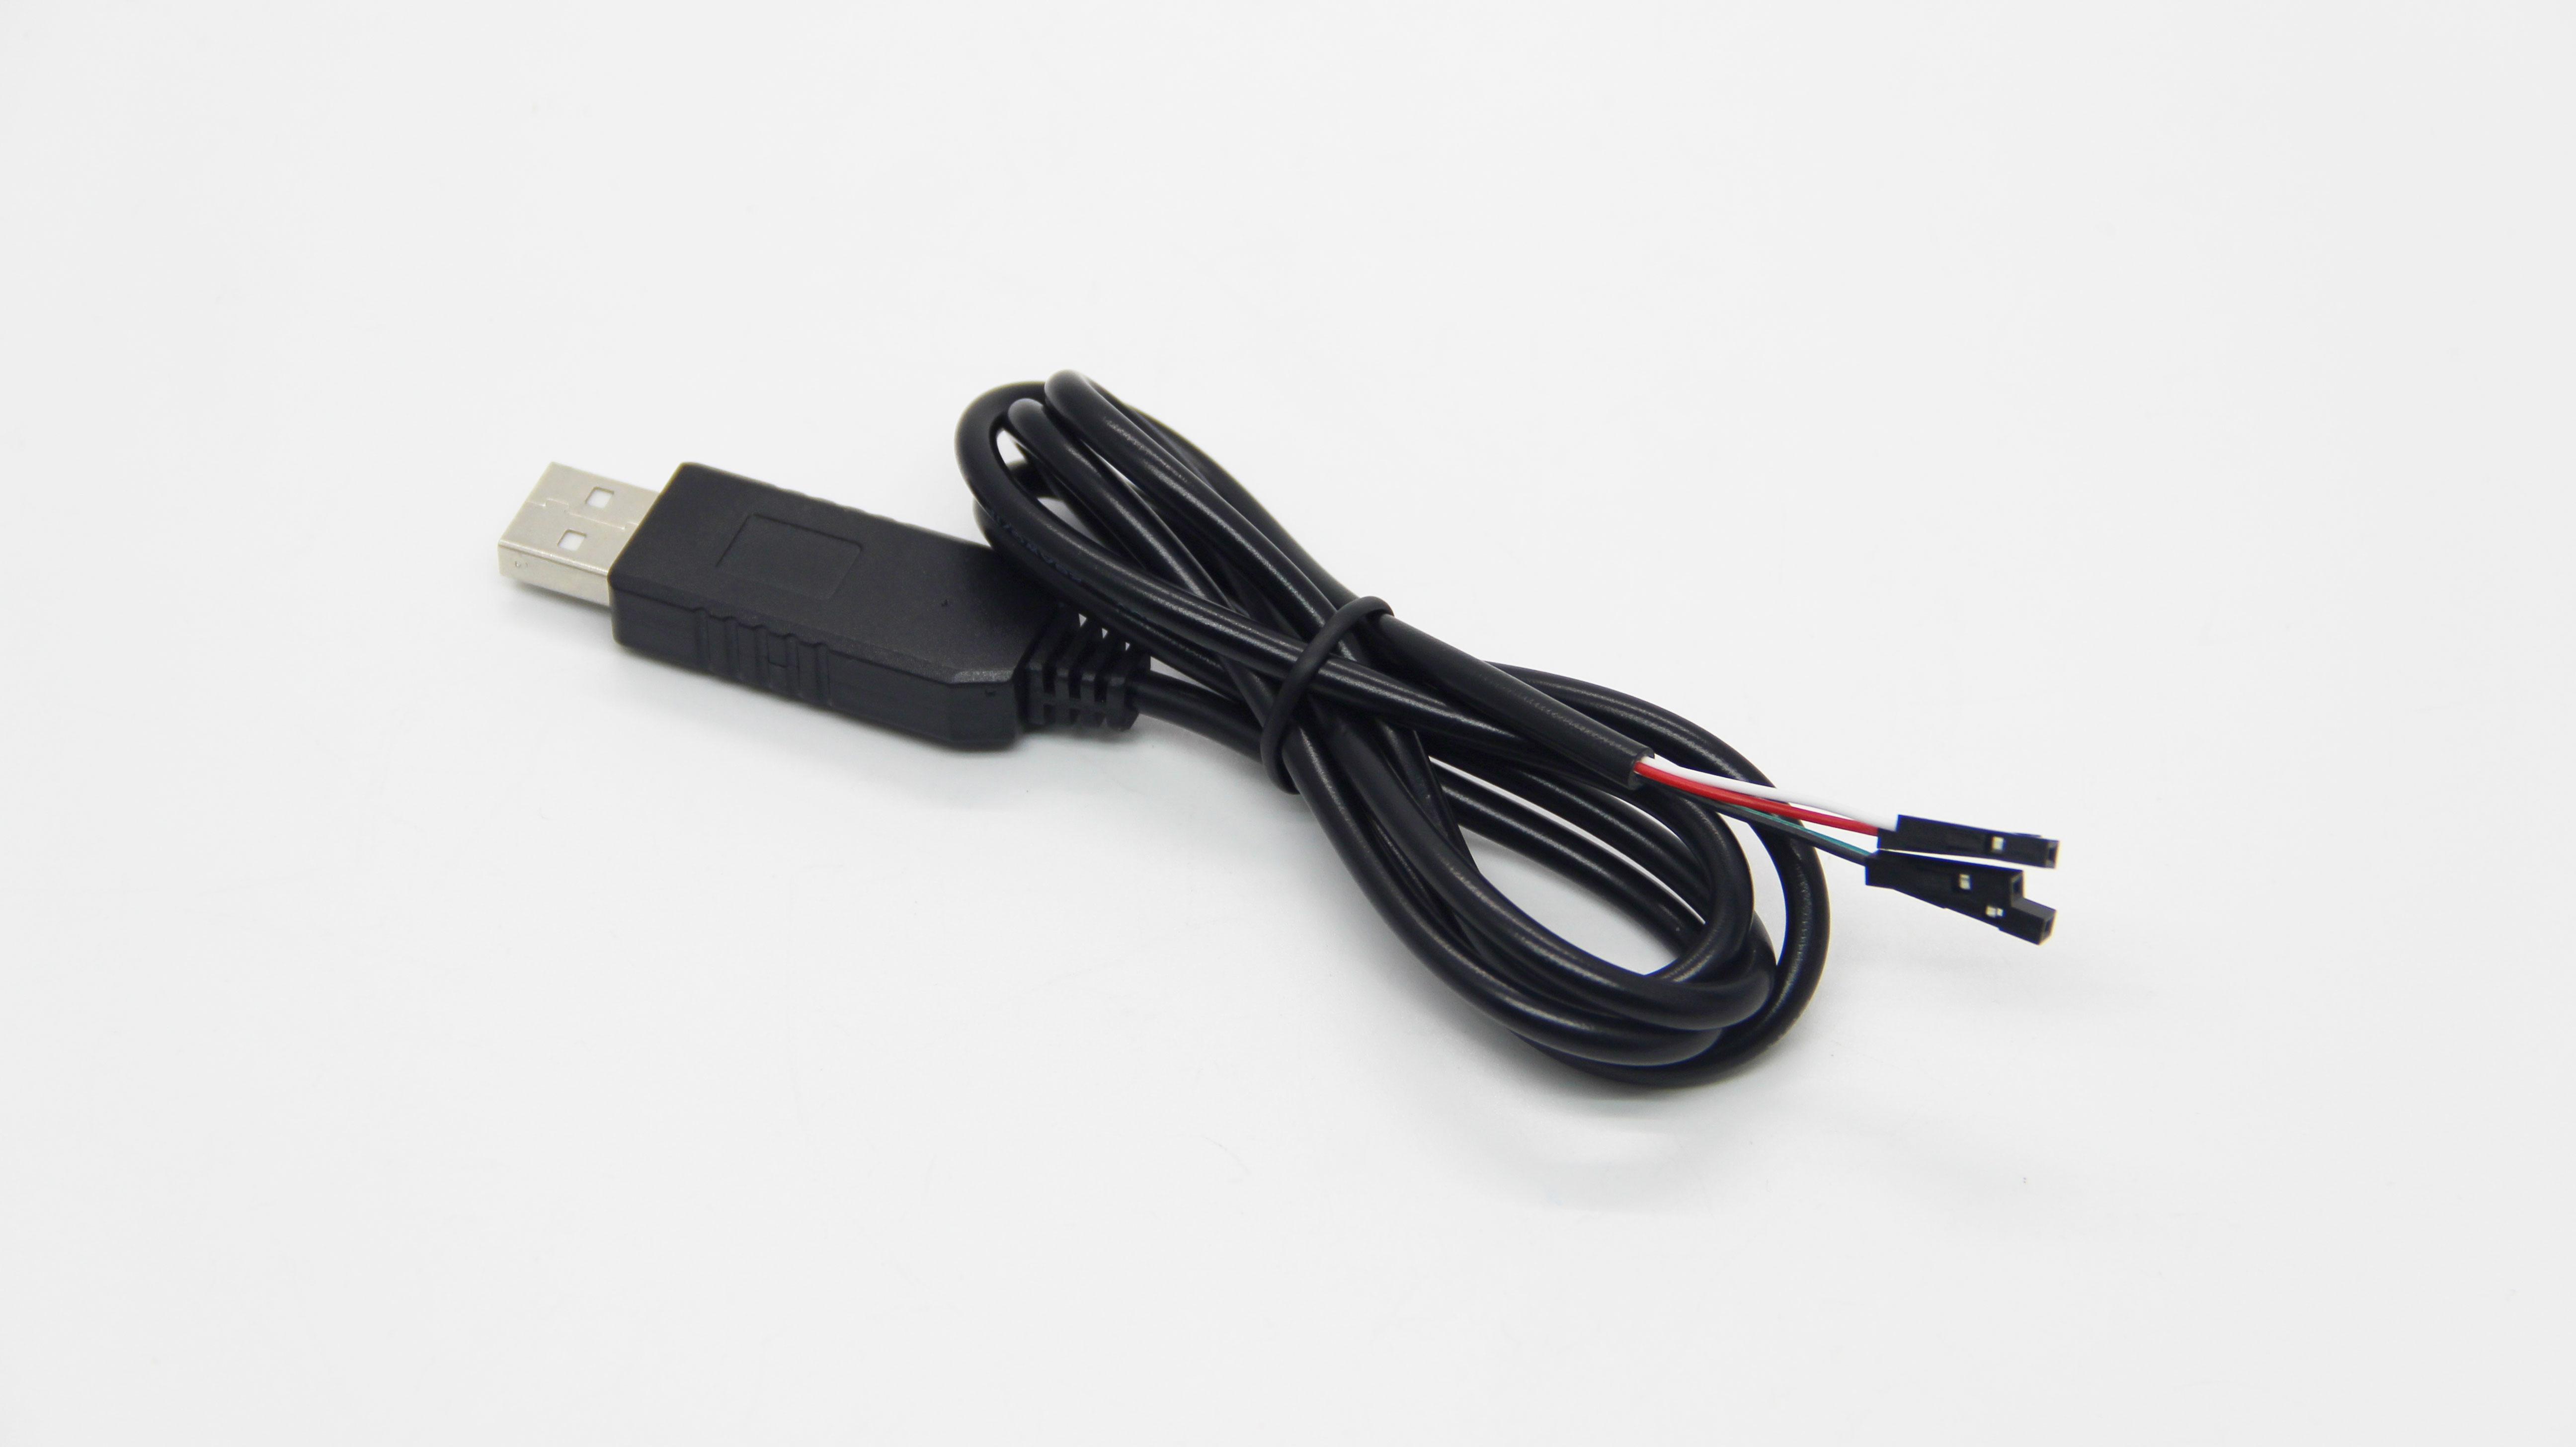
This series port tool can help you debug system and get all system log event when in u-boot stage.
More help can visit this website get more docs and driver support: http://dl.cubieboard.org/tools/Usb-Uart-Cable/
7.2. ADB
The system is opened USB ADB debug , you can get all root permissions. User must install ADB tool and add USB ID in PC,and then Use Micro USB cable to connect PC and CB6. Execute the command to cat USB ID.
$lsusb
Bus 003 Device 026: ID 10d6:0c02 Actions Semiconductor Co., Ltd
$sudo vim /etc/udev/rules.d/70-android.rules
Add the following line in /etc/udev/rules.d/70-android.rules
SUBYSTEM=="usb", ATTRS{idVendor}=="10d6", ATTRS{idProduct}=="0c02",MODE="0666"
Execute the command to enter adb mode.
$sudo chmod 777 /etc/udev/rules.d/70-android.rules
$sudo service udev restart //restart usb service
$echo 0x10d6 > ~/.android/adb_usb.ini
$adb kill-server
$sudo adb shell //enter adb debug mode
If you can enter adb debug mode,but permissions is insufficient,you should execute the command.
$adb kill-server
$sudo adb root
$adb shell mount -o remount,rw /+document name
$adb shell
EG:
$adb shell mount -o remount,rw /misc
//given read write permissions to misc directory which in CB6 android file system